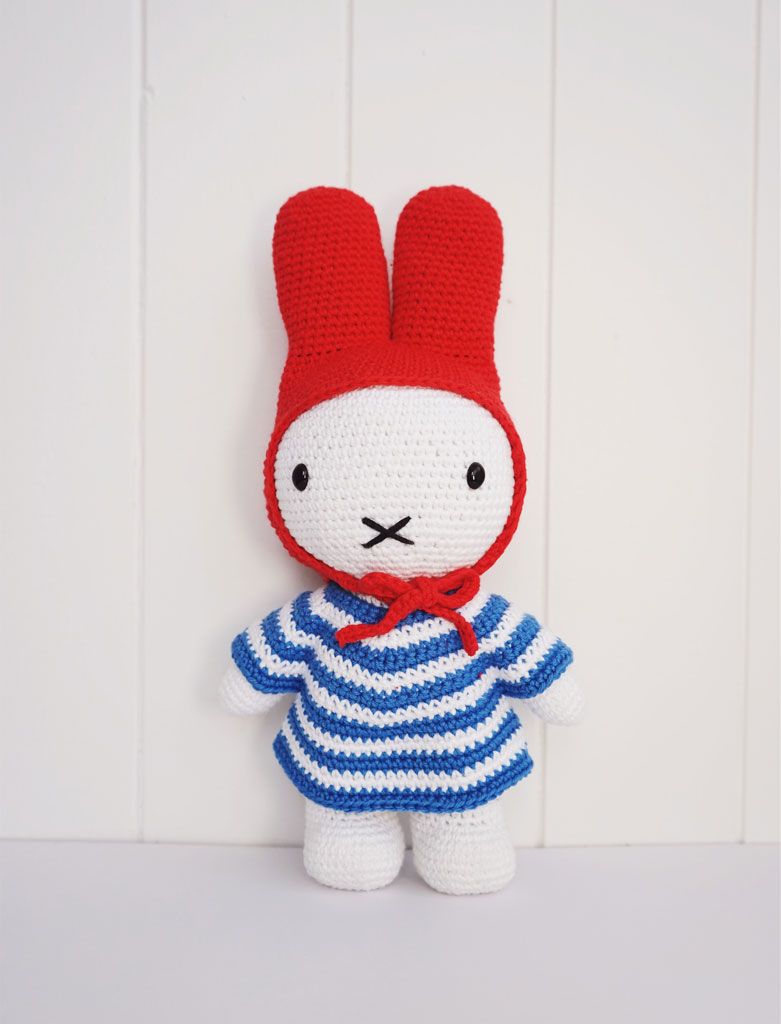
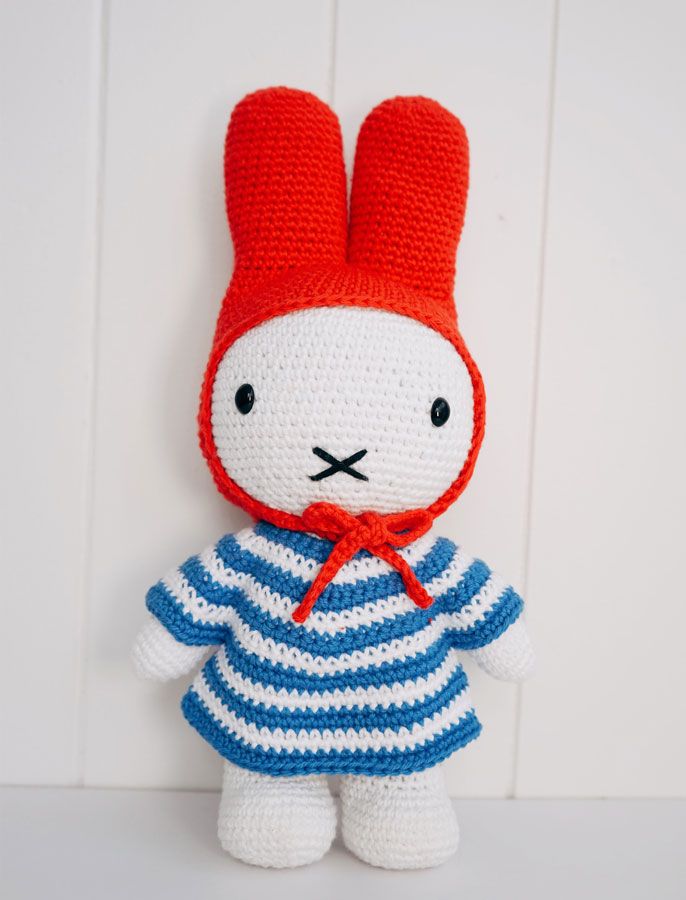
The other day, my friend sent me a photo asking if I could make her a Miffy toy that she saw in Japan, I instantly fell in love with this cute character and began my journey to crochet my ultimate Miffy!
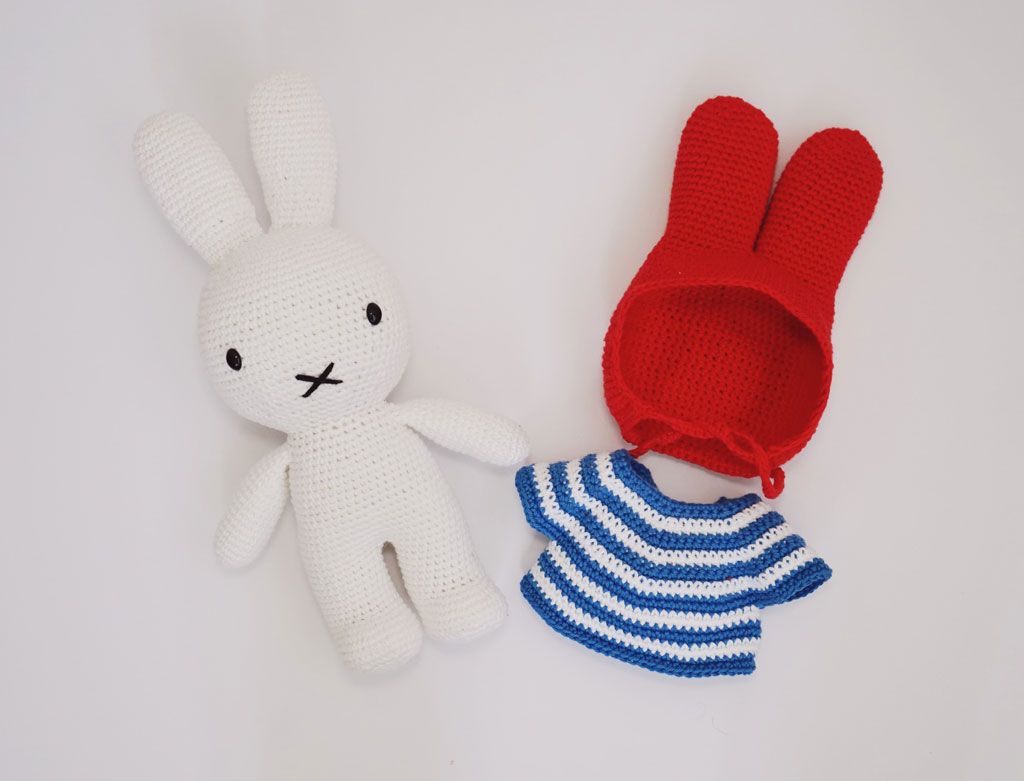
I wanted a Miffy that could dress up! So a separate hood and dress is a must. I use the continueslly techniques for the head and and body that I learned from the amazing book Anaimal friends from Pica Pau. I used the seamless seam trick for the neck from Crochet Club below to create the sewing effect without breaking the yarn.
Pattern: Self draft
Yarn: 100% 8ply Cotton - White(2 x 50g balls), Red, royal blue and little bit black for the mouth
Others: 2 x 11mm oval eyes
Hooks: 2.75mm for the body and 3.25mm for the dress and hood
Finished size: around 32cm tall
I started crochet the head and the body, then separated yarn to continue the legs. The ears and arms were stuffed lightly and then sewn on to the body.
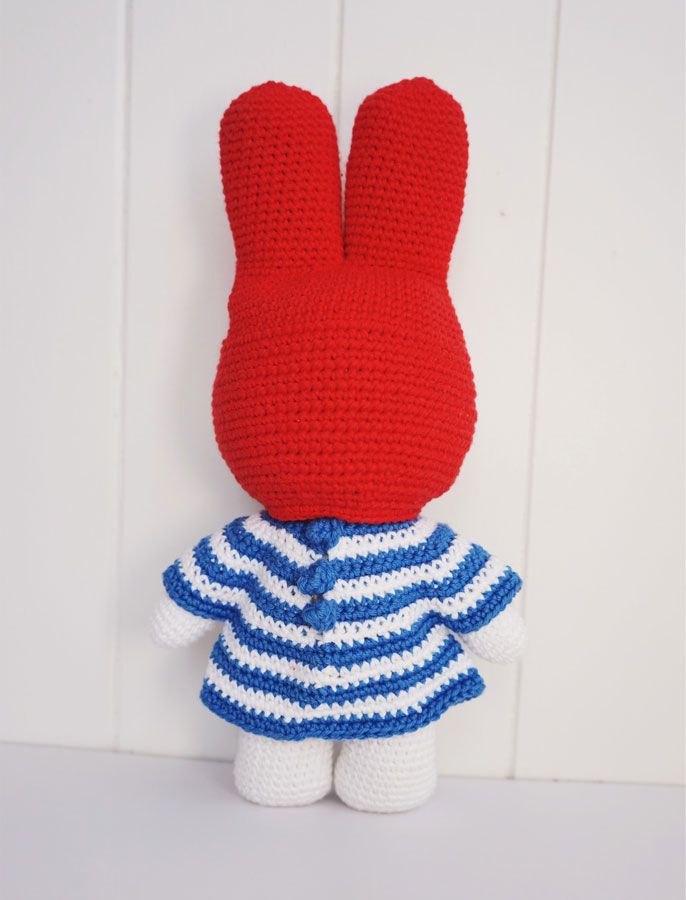
I made 3 crochet buttons on the back of the dress so it can be remove easily. For the little red hood, side braids were added to shape the hood when worn on Miffy.
To center the buttons on the back, I started crocheting the dress flat and crochet in the round after I finished the buttons.
For invisible join on stripe pattern, I like to use technique from Knit and Crochet Ever After to avoid jogs.
The hood was started in the round, leaving the middle gap for the ears that will be joined later. When I have enough to cover the top of the head, I started to crochet flat for the back of the hood. For this section, I crochet backwards when I turn the work to keep the stitches uniform.
I'm right handed, so even though stitches look the same, crocheting backward can still show a little difference on stitch direction, but it does look a lot better in my opinion.
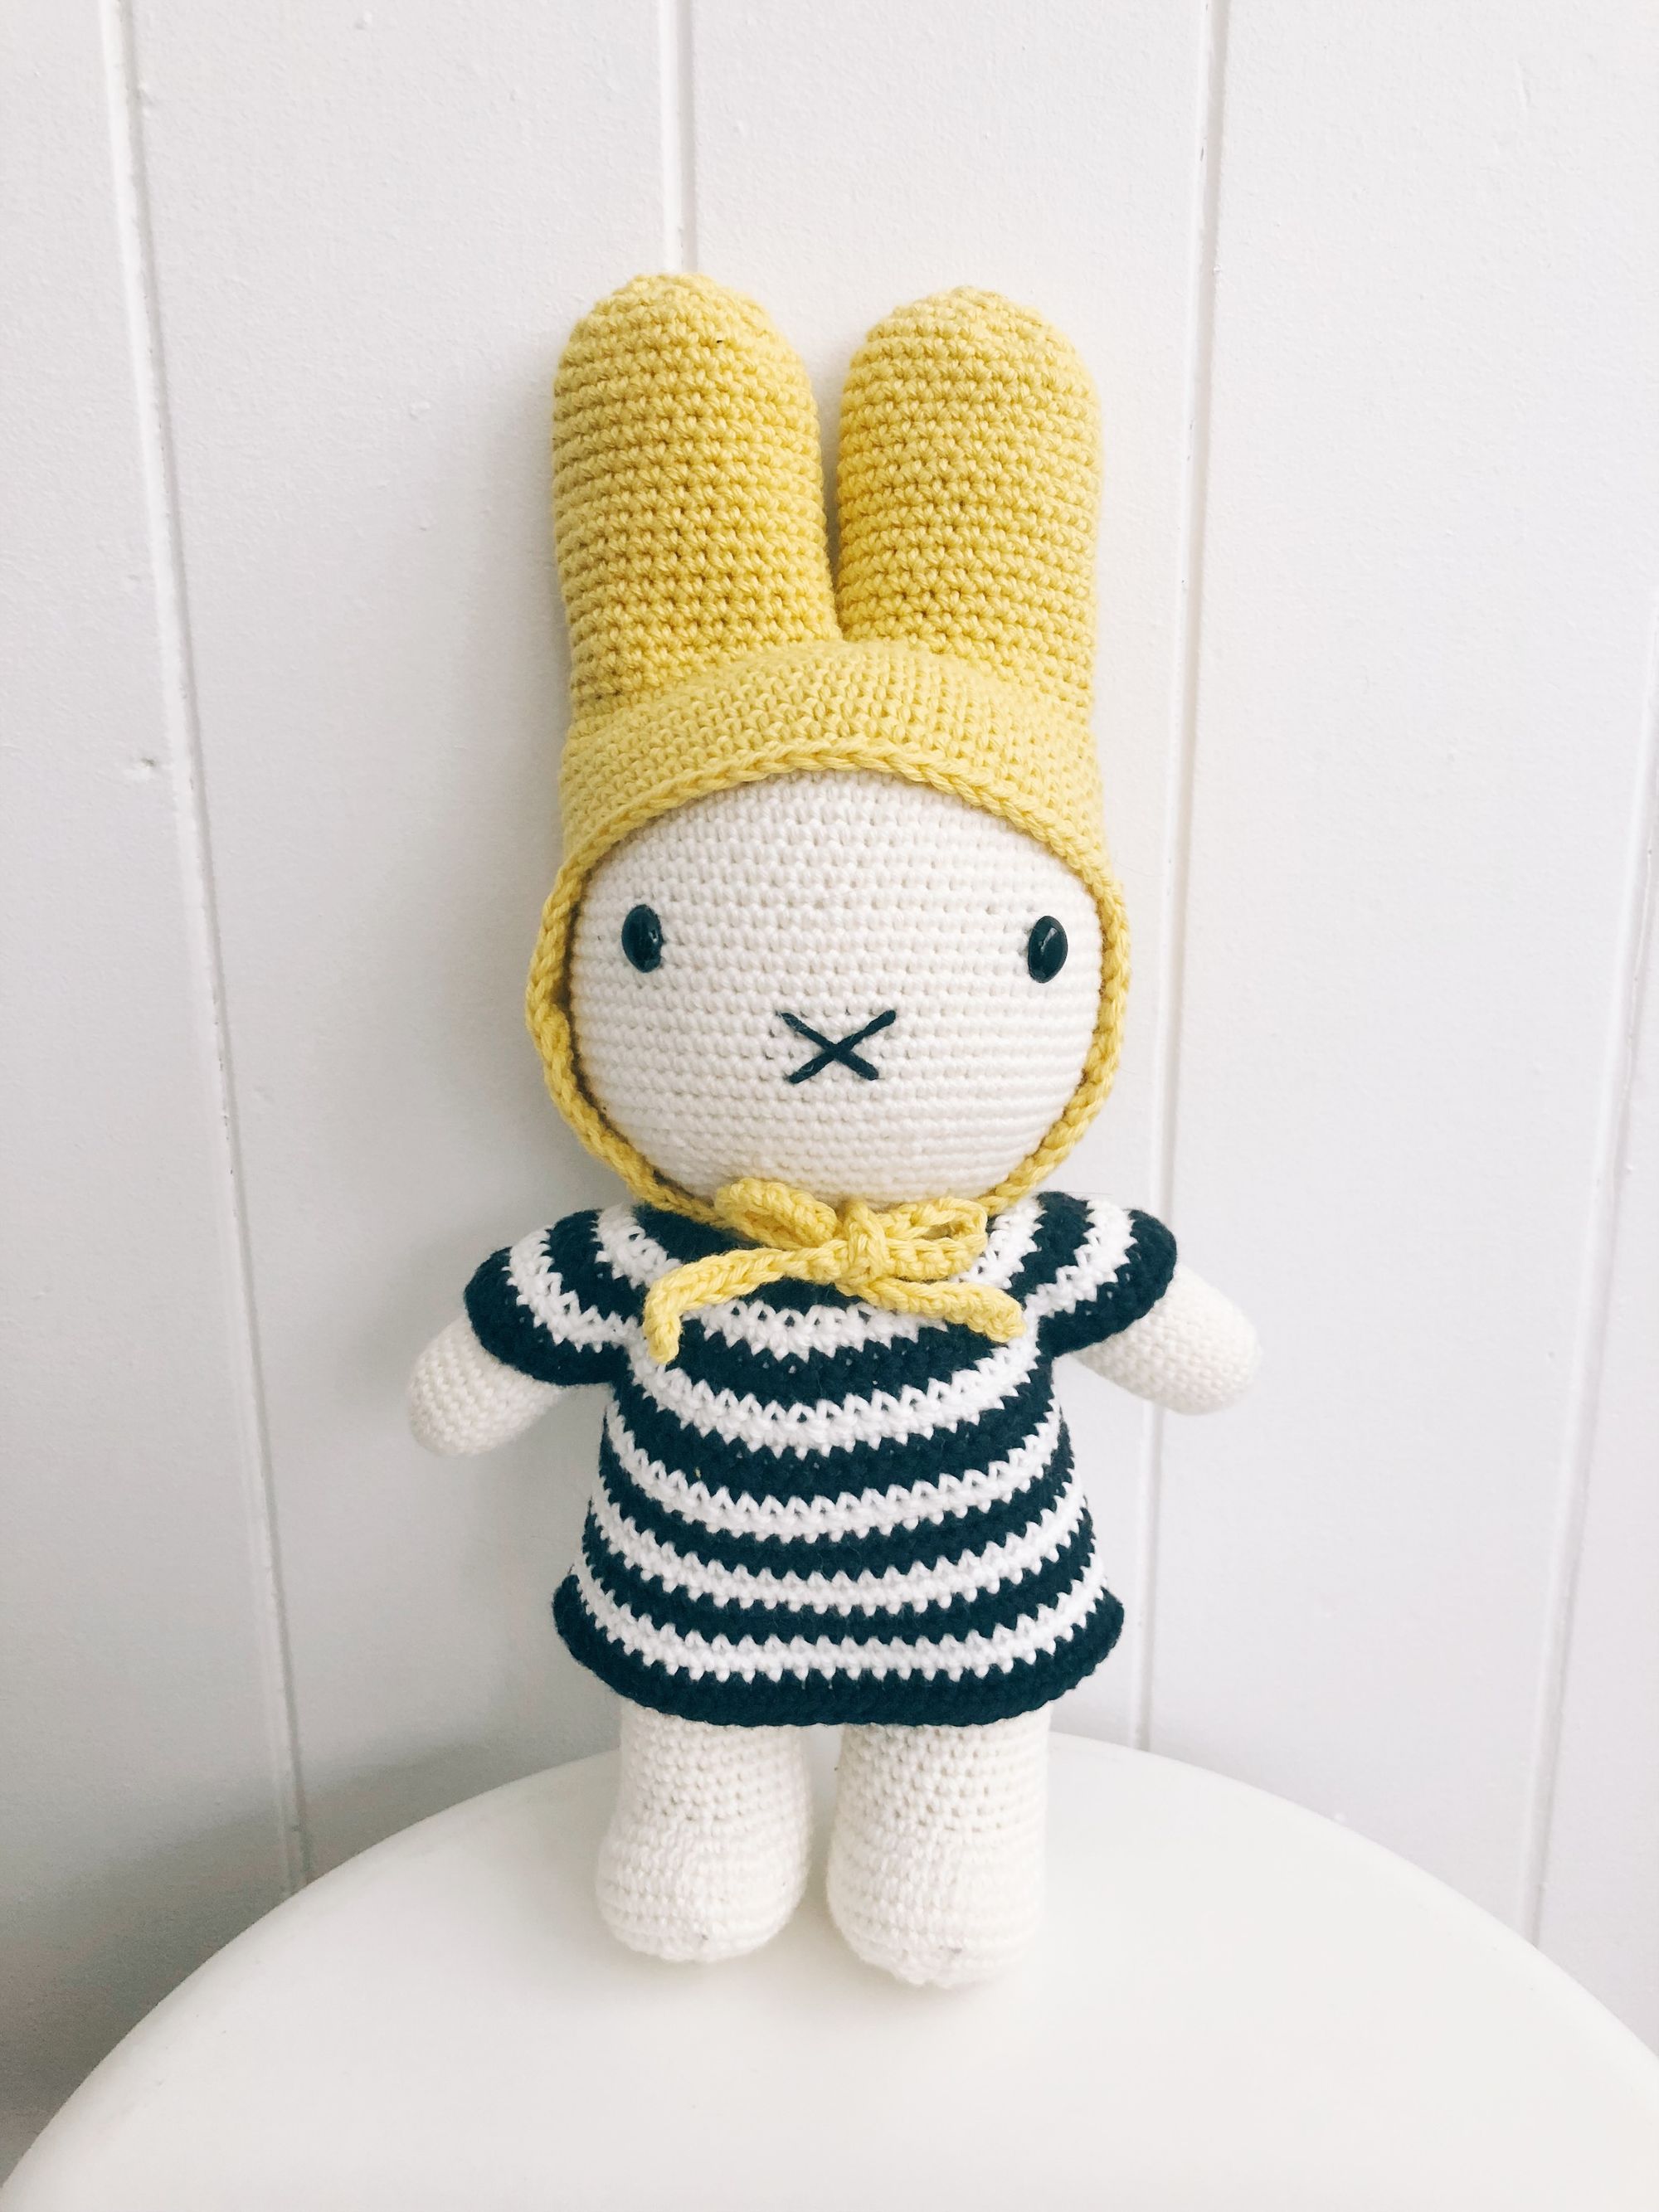
This is my second version, below are my first versions that using 4ply yarn, which one do you like better?